Category Archives: cakes

The Miraculous Flour-Less Chocolate Cake

DSC_0061

In 1996 my mother bought me a cookbook.

The book titled ‘YUM’ by Terry Durack, a well known Australian food writer and critic, still commands prime position on my now heavily laden shelf, 20 years on. There are several reasons for this. The most important one being the recipe for his Miraculous Flour-Less Chocolate Cake.

The binding of the book has long fallen from its cover. There are smudges of chocolate over its pages. The paper it was printed on is looking a dull shade of white yellow, but still this book remains on my shelf. Why? Because it’s the best darn chocolate cake I’ve ever baked!

I practically know the recipe off by heart, (I’ve baked it so many times), yet I still take the book out each time and savour those smudges, those faded pages, and the reminiscing it invokes of all the times I’ve cooked and eaten this cake from this cookbook.

DSC_0056

I was a third year apprentice chef, learning the ways of the kitchen, and how to thrive in (at the time) a male dominated industry, when I was given this book. Lets say it has sentimental value. ‘Yum’ reminds me of long hard days working in professional kitchens, being young and free, learning to cook, and what makes a good recipe. And my Mother, it reminds me of my Mother.

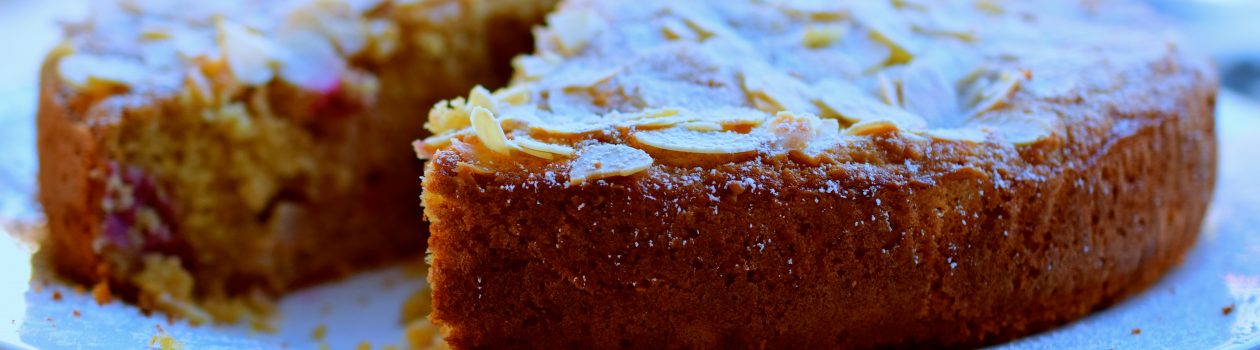
But the Miraculous flour-less chocolate cake recipe, lets talk about that! I think it’s the fudge like consistency that I’m most attracted to. It’s never dry like some flour based chocolate cakes can be. The blending of melted chocolate, butter and almond meal feels strong, and then the folding of whisked egg whites makes it light. 

For me, the importance of good cook books are the memories they can invoke. We’ve all been exposed to many an average cookbook. You know the ones. Someone gains a little celebrity status and they then write a cookbook book full of over saturated recipes trying to make us believe they are experts in the felid of cooking. Those cookbooks leave me feeling uninspired.

‘Yum’ on the other hand is of a different era, where cookbooks were peoples life work; recipes they’d been cooking for years. Recipes of substance and worth.

To quote Terry Durack, in reference to his Miraculous Flour-Less Chocolate Cake recipe he says ‘I borrowed it from Jill Dupleix, who borrowed it from Elizabeth David, who borrowed it from the French. It taught me the value of borrowing recipes’.

And his words in turn taught me the value of sharing recipes. Enjoy!

DSC_0055

The Miraculous Flour-Less Chocolate Cake

(Adapted slightly from ‘Yum’ – Terry Durack)

200g 70% cocoa dark chocolate

150g caster sugar

150g butter, diced

100g ground almonds (almond meal)

5 free range eggs, separated

To Finish

Dutch cocoa or icing sugar 

Cream or ice-cream 

Pre heat oven to 175C Line a 20cm cake tin with baking paper.

Melt the chocolate, sugar and butter in a bowl sitting on a pot of simmering water.

Remove from heat, stir thoroughly to combine. Mix in the ground almonds, then beat in the egg yolks one by one.

Beat the egg whites until they form stiff peaks, and stir a couple of spoonfuls into the chocolate mixture to lighten it, before gently folding in the rest.

Pour into the cake tin, and bake for 40 minutes.

Leave to cool slightly before removing from tin. Dust with cocoa, or icing sugar, or eat as is. Serve with cream or ice cream.


Raspberry Almond And Buttermilk Cake


DSC_0080

It doesn’t come naturally for me to share my personal life here on my blog, this has always been a space to share recipes, post my photographs, and write about food. But there are some things, and some events, that change everything. These are the ones that must be shared. So it seems as good a time as any to spill the beans that I’m six months pregnant. In just under 3 months time our lives here will be far from quiet!

This will be my third baby (yikes!). I have no illusions of grandeur, of getting any sleep for the first six months, or of having any time to my self really. I daydream about sleepily rolling out my yoga mat with baby by my side as I try to establish back my post baby yoga-body. I console and remind myself that my ten and seven year olds will be excellent helpers and of course my husband too, who this being his first baby can’t wait to experience every moment of it.

Then, as I have always done over the years, to settle my nerves, or calm my mind, I turn to my kitchen, and I cook.


DSC_0069

And what better thing for a pregnant woman to cook than cake! Cake has been my saving grace, my shining knight, my obsession.

The golden hue to this – I’d almost say wholesome – cake is largely due to the whole wheat flour and brown, rather than white, sugar, with the added benefit of almond meal and sliced almonds for protein. This more wholesome style of baking is becoming my preference.

I like less sugar in my cake. I feel happier about eating it if there’s fibre, and whole grains, and now that I’m eating for two there’s a satisfaction and fullness that comes from altering white flours, and white sugars, for their less processed cousin.


DSC_0050

The first slices of this raspberry, almond and buttermilk cake, served still warm from the oven, are the best. The days that follow, I like to lightly warm the cake through, and always find the excuse to serve it with cream.

Frozen raspberries are perfectly fine for baking, yet if you can get some fresh ones to garnish the cake with you’ll be all the more happier for the effort.


Raspberry, almond and buttermilk cake 

150g softened butter

100g brown sugar

1 tsp vanilla bean paste

2 free range eggs

200g plain whole meal flour

50g almond meal

1/2 tsp bi carb soda

1 tsp baking powder

1 cup buttermilk

1 cup frozen raspberries

40g sliced almonds

To serve

Cream

Fresh raspberries

Pre heat oven to 175C Line a 23cm spring form cake tin with baking paper.

Place the butter, sugar and vanilla in a bowl and whisk on a medium high speed for 1 minute. Add the eggs one at a time beating between additions, and scraping down the sides of the bowl till fully incorporated.

Sift the bi carb and baking powder onto the butter mixture, add the whole meal flour, almond meal and buttermilk and beat till well combined.

Add the frozen raspberries and fold gently to combine. Spread the cake evenly into the lined tin, sprinkle the top with the sliced almonds and bake for 50 minutes, or till an inserted skewer comes out clean.

Remove the spring form tin and cool the cake on a wire rack. For best results, serve slices of warm cake with cream and fresh raspberries.


Upside Down Blueberry, Hazelnut And Ricotta Cake

DSC_0287

Cake has a wonderful way of making everything seem good and bright and cheery.

This upside down blueberry cake is light and fruity and not-too-sweet.

Why is it an upside down cake? The blueberries sink to the bottom of the cake during baking so flipping it over onto a plate lets the dark purple colours shine through. It’s far prettier served upside down. The crumbled chunks of ricotta create little pockets of soft cheese that surprise and excite when you spoon into the cake and find them there nestled next to the tangy blueberries.

Although i’d usually make this cake with almond meal, today I’ve used ground hazelnuts. But to be honest I think the almond is the way to go. You can be your own judge, and try either or both.

DSC_0271

DSC_0278

Upside down blueberry, hazelnut and ricotta cake 

4 free range eggs separated

150g caster sugar

65g plain flour

1/2 tsp baking powder

50g hazelnut meal

Zest of 1 lemon

100g melted butter

150g ricotta

125g punnet fresh blueberries 

To serve

Icing sugar

Thickened cream 

Pre heat oven to 175C. Line a 22cm spring form cake tin with baking paper.

Place the egg yolks and caster sugar in a medium bowl and whisk for 1 minute till light and creamy.

Sift the flour and baking powder onto the eggs, add the hazelnut meal, zest of lemon, and melted butter, and whisk to combine.

Meanwhile, whisk the egg whites to a soft peak.

Add half the egg whites to the cake mixture and fold gently, add remaining egg whites and fold till combined. Finally, crumble to ricotta in large chunks into the cake, add the blueberries fold gently and pour into lined cake tin.

Bake the cake for 40-45 minutes. Cool on a wire rack (don’t serve it warm, it’s better cold).

To serve, place an upside down plate over the cake, flip it over and remove the base. Sprinkle with icing sugar and serve with thickened cream.


(C) Copy right 2016 – Upside down blueberry, hazelnut and ricotta cake

Nectarine and Coconut Bread

DSC_0023

Nectarines have become a favourite summer fruit and when they are this good and plentiful I buy nothing short of a kilo at a time. With these sweet beauties I decided to make a simple nectarine and coconut bread. Well, it’s more like a loaf really. I call it a bread as after enjoying it fresh on the day, the following day I toast it much the same as you would banana bread. It’s delicious with a lathering of butter and I find it hard to resist when served with a cup of hot tea.

This is getting a little personal. Do you ever store your fruit in the fridge? Please tell me you don’t. Please tell me you buy small amounts of in-season fruit, placing the pieces in a bowl on the bench or kitchen table so that you may enjoy the sweeter flavours of the natural sugars when the fruit is eaten at room temperature. Please, can you tell me that? Refrigerators are not meant for fruit. Especially stone fruit.


DSC_0028

This loaf, or sweet bread, has a method similar to making muffins. All the dry ingredients are placed in a bowl, the diced fruit is added, followed by the whisked eggs, milk and melted butter. The stirring is minimal, just as with muffins. This is important to keep the softness to the loaf, over stirring will give a tougher finish. I’ve used white nectarines but yellow ones are just as good. Smell the fruit before you buy it and pick the variety with the sweetest smell. When summer is over, and autumn begins, you can make this same loaf with pears instead of nectarines, for this 2 medium sized pears would be sufficient.


DSC_0063

DSC_0094

Often what I do with this loaf is slice a few portions and freeze then individually so the following week when I fancy something for morning tea it’s on hand, and goes straight in the toaster and gets served with organic butter and raspberry jam.


Nectarine and coconut bread

Ingredients 

260g (2cups) wholemeal self raising flour

35g (1/3 cup) hazelnut or almond meal

50g (3/4 cup) shredded coconut

100g (1/2 cup) caster sugar

1/2 tsp bi carb soda (sifted if lumps are present)

3 white or yellow nectarines diced into 1cm pieces

100g butter, melted

2 free range eggs

1 tsp vanilla bean paste, or vanilla extract

125ml milk


Pre heat oven to 175C, or 165C fan forced. Lightly grease a loaf tin with butter then line the tin with baking paper.

Place the flour, hazelnut meal, coconut, sugar, and sifted bi carb soda in a large bowl, stir to combine. Make a well in the centre and add the diced nectarines.

In a medium sized jug, melt the butter, add the eggs, vanilla and milk, and whisk till well combined.

Pour the egg mixture onto the flour and stir briefly till the batter just comes together (remember not to over stir). Pour the batter into the lined tin, and spread lightly till surface is even. Bake in the oven for 60 minutes, or till an inserted skewer comes out clean. Remove from oven, cool slightly in tin then remove from tin and cool completely on a cake rack.

Once cooled, slice the nectarine bread and serve with butter and your favourite jam.


Chocolate, Avocado and Macadamia Nut Brownie

DSC_0087

When I first started out as an apprentice chef (all those years ago) I would of never considered combing avocado and chocolate. No Way! I would of screwed my nose up and shouted “don’t be ridiculous”. But these days, I’m excited by the idea.

Last year I experimented with chocolate and beetroot and found this combination to be earthy and tasty, and right. I feel much the same about combing avocado with chocolate; there’s an earthiness, and richness, and a depth to the taste; it’s perfect baked into a brownie. It’s fun.

DSC_0035

DSC_0040

DSC_0044

A pinch of sea salt can do marvellous things when used with chocolate. I added some to the avocado, which was then folded through the melted chocolate and this gives the chocolate that salted kick. It takes the edge away from the sugar and balances the chocolate in a most alluring way.

Macadamia nuts are native to Australia and I find myself using them in everything. I love them in this brownie. You might consider hazelnuts or walnuts, but macadamias have a creamy nuttiness that work so humbly beside the avocado.

Generally speaking, I like my brownie pretty fudge like, you know, almost under cooked. The brownie I’ve photographed needed five minutes less – damn phone ringing – 18-minutes would be perfect for fudge-like brownie, 22-25 minutes for those who like it cooked through.


DSC_0074

DSC_0090

Because I’m mad about bitter chocolate, when the brownie came out of the oven, I grated some Venezuelan 100% cocoa chocolate on top. I also dusted it with cocoa, this was probably an over kill.

My five year old can longer tell me she doesn’t like avocado because, ha, she ate it in this brownie and never knew the difference! I will forever use this an an example that she REALLY DOES like avocado.

Chocolate, Avocado and Macadamia Nut Brownie – makes 15 pieces

Ingredients 

200g 70% cocoa chocolate

125g butter

2 eggs

150g ( 2/3 cup) caster sugar

150g (1 cup) plain flour

1 large avocado

1/4 cup milk

pinch sea salt

80g (1/2 cup) macadamia nuts

To serve – optional

Dutch cocoa for dusting


Pre heat oven to 170C. Line a 30cm by 20cm tray with baking paper.

Chop the chocolate into small pieces and place in a medium bowl with the butter. Place the bowl over a shallow pot of simmering water and allow the chocolate to melt. Remove from the heat, stir till smooth and well combined. Set aside.

Meanwhile, place the eggs and sugar in a bowl and whisk on medium speed for 5 minutes till light and fluffy.

Place the avocado flesh, milk and sea salt in a food processor and blitz till smooth (if you don’t have a food processor you could mash the avocado with a fork, add the milk after it’s mashed and try to get it as smooth as possible).

Add the pureed avocado to the warm melted chocolate and stir to combine. Add the chocolate and avocado to the eggs and sugar and fold gently. Sift the flour onto the chocolate mix, add the chopped macadamias and fold till just combined. Pour into the lined tray, and evenly smooth out the batter, Bake in the oven for 18-20 minutes – if you like it soft and gooey, or 22-25 minutes – if you like it a little firmer.

Cool in the tin for 5 minutes. It’s optional at this point to grate some extra chocolate on top (whilst it’s still warm). Remove brownie from tin and cool on a wire rack. Cut into desired pieces, and dust with cocoa, or sprinkle with sea salt, if you wish. Store in an air tight container for 3 days.

Lime and coconut cheesecake slice

DSC_0105

You might mistake me for being obsessed with sugar if you were to know I have SEVEN different types of it in my pantry at home! How this has come to be, I’m not entirely sure.

I obviously do a lot of baking and need caster sugar, and brown sugar as a standard. My husband buys coffee sugar, though it’s so similar to the demerara sugar we also have in the cupboard, I wonder why he bothers. Then there’s the cane sugar, I think that was given to me as a gift. I use raw sugar in my tea, and just recently, I bought some coconut sugar, because, there’s obviously a shortage here!

DSC_0028

Coconut sugar is different. It’s not as sweet as processed white sugars and it has a lower GI, 35 compared with white sugars 60 something.  It’s extracted from the sap of blossom buds from the coconut palm.

You’d expect the flavour to taste of coconut but it doesn’t! It has hints of caramel that are subtle and earthy and it’s dark colouring adds a soft brown tinge to any thing it’s baked in. It’s in the base for this coconut and lime cheesecake and in the cream cheese filling too. Although I’m a sucker for dessert, I hate overly sweet ones. What I liked about using the coconut sugar was it didn’t make the cheesecake too sweet. You could still taste the lime AND the cream cheese.

For those who can’t get their hands on coconut sugar you can substitute it in both parts of the recipe with brown sugar (a favourite of mine in baking). But if you like to experiment, I highly suggest giving the coconut sugar a try.

DSC_0056

DSC_0057

The zest and juice of any citrus fruit will serve you well when flavouring a baked cheesecake.  I’ve used lime in this one but you could just as easily use lemons, or tangellos, mandarins, or grapefruit. Just recently, I wrote a recipe for the magazine that used tangellos in the cheesecake filling and it was a huge success.

Success also comes with not over cooking your cheesecake. Any cheesecake I bake generally gets 45 minutes in the oven at 150C. You get perfect cheesecake every time – with no cracks! A slight wobble to a cheesecake is a good sign – remember it will firm up as it’s left to cool.

DSC_0103

DSC_0115


 Lime and coconut cheesecake 

Ingredients 

For the base

1/4 cup coconut sugar

3/4 cup self raising flour

1/2 cup shredded coconut

1/2 cup almond meal

100g butter, melted

For the filling

500g cream cheese

1/3 cup coconut sugar, plus 1 tbsp for garnish

2 limes – zest and juice

1/2 cup Greek style yoghurt

4 eggs

To garnish 

3 tbsp toasted coconut


Pre heat oven to 150C. Line a 23cm square tin with baking paper. Place all the dry  ingredients for the base in a medium sized bowl, add the melted butter and stir till well combined. Press the mixture into the lined tin. Use your hand to press the base and make an even surface. Bake in the oven for 15 minutes. Remove base and set aside to cool slightly.

Meanwhile, chop the cream cheese into pieces, place in a food processor with coconut sugar, lime zest and juice and yoghurt, blitz till mix is smooth. Add one egg at a time and blitz between additions till all eggs are incorporated.  Pour the cheesecake mix onto the baked base, sprinkle with the remaining 1 tbsp coconut sugar and bake for 45 minutes.

Set cheese cake aside to cool completely. To garnish, sprinkle cheesecake with 3tbsp toasted shredded coconut (optional). Slice cheesecake into squares. Serve as is or with double cream.


Chocolate, chia and banana cake

DSC_0312


It’s high time I posted a cake recipe. The last cake recipe I shared was an old favourite I’ve been baking for years, one my sister has taken to and now bakes for any and every occasion a cake is required. But this little beauty is a new recipe. It’s based on a simple banana cake but tweaked with the addition of chia seeds and dark chocolate. The dark chocolate is of the high cocoa bean variety. I tend to use 70% cocoa bean chocolate in ALL my baking now and often buy the organic and fair trade blocks.  It’s bitter slightly tangy flavour is preferred to the sugary milky chocolate that’s so often sold to home cooks. Plus, dark chocolate contains higher amounts of antioxidants and flavonoids, that’s gotta be a good thing right?


DSC_0295

DSC_0299

The delight in learning how to use chia seeds has come through my baking. When you soak chia seeds in water, they turn to a thick gel and can actually replace the use of eggs. Soaked chia seeds act in much the same way as eggs do in baking by holding the cake together. I have a cherry and chia seed cake I like to bake. The chia seeds give it a chewy outer crust whilst keeping it moist, much the same as a cake rich with eggs would. I’m into this chia seed thing.

It’s inevitable, especially when you have kids in the house, to always have a few over ripe bananas gathering spots in the fruit bowl. The positive aspect of this is, overripe bananas are the ones to use in your baking. Brown spotted bananas have the best flavour and sweetness for banana cakes, muffins or loaves.  And over ripe bananas can be frozen too, so there’s no need to toss them out. Rejoice in the brown spotted banana! Freeze them with their skins removed and you’ll have them on hand at any time a banana cake is required.


DSC_0331


Chocolate, chia and banana cake

Ingredients 

125g softened butter

1 cup brown sugar

2 large ripe bananas, mashed

200g plain flour

50g wholemeal self raising flour

1 tsp bi carb soda

1 egg

2 tbsp chia seeds

1/4 cup water

1/2 cup milk

1 tsp cinnamon

1/2 tsp mixed spice

Pinch salt

1/2 cup pecans, chopped


Pre heat oven to 180C. Line a 23cm spring form cake tin with baking paper. Place chia seeds in a small bowl, add 1/4 cup cold water and whisk to combine, set aside for 10 minutes. In  a separate bowl, sift together the plain flour and bi carb soda, add the wholemeal flour, spices and a pinch of salt.

Place softened butter and sugar in a mixing bowl and cream till well combined. Add egg and beat till combined. Add mashed banana and soaked chia seeds, beat to combine.  Add prepared flour with spices and milk, beat slowly till combined. Add chopped dark chocolate and fold till just combined.

Place mixture in prepared tin and bake for 50 minutes. Stand for 10 minutes. Remove spring form cake tin and allow cake to cool on a  baking rack. Once cake is cool, cut into wedges and serve as is or with double cream.

DSC_0317


Life would be dull with out cake

P1030768


Life would be dull with out cake. I try to eat it only on occasion, and some times I manage, other times I can’t help myself. I need cake in my life. It makes me happy.

A good recipe should be shared and this one already has been. I learnt this recipe from a chef I worked with, at Zinc cafe, many years ago. She was a great baker and engaging mentor and helped set me on the path to understanding the science of baking.  This cake has also featured in the magazine I write recipes for because it’s too good to keep to myself.  I’ve baked this coconut lime and ginger cake so many times now I’ve lost count. That’s a good thing.


P1030747


Baking is a learnt skill and one that needs to be practised. When I first started my chef apprenticeship I was terrible at baking.  I knew  the bare essentials. My cakes often flopped and my pastry always shrunk. There wasn’t the opportunity, in a busy kitchen, to learn on the job. I had to teach myself. I studied Stephanie Alexanders “The cooks companion” in my early days of learning how to bake. Her encyclopaedic book contains many excellent recipes. And over time with some disasters came successes.  I discovered the joy of pulling a well-risen cake from the oven and of making pastry that was flaky and buttery and didn’t shrink. So for those out there who don’t bake, have perseverance, it’s a worthy skill to master.


P1030752


I love the large chunks of ginger, on this cake, they give a burst of pepper flavoured zing. You could grate the ginger instead of slicing it, so it’s finer and less punchy. Thanks to the ginger and lime syrup, the cake keeps moist for several days. I keep it in the fridge and on day two and three give it a quick zap in the microwave to soften it up again. Double cream is optional but not necessary.


P1030769


Coconut lime and ginger syrup cake

Ingredients

For the cake

190g butter, softened

280g (1 ¼ cups) caster sugar

1 lime zested

4 eggs

3 cups desiccated coconut

150g (1 cup) self raising flour, sifted

1/2 cup sour cream

For the syrup

2 limes, zested and juiced

50g ginger, peeled and sliced thinly

1/2 cup caster sugar

1/4  cup  water


Pre heat oven to 170C or 150C fan forced. Line a 23cm spring form cake tin with baking paper.


Cream butter, sugar and zest of 1 lime till pale and fluffy. Add eggs one at a time beating between additions; scrape the sides and bottom of the bowl during additions of egg.


Add coconut, flour and sour cream; beat till combined. Spoon cake mix into lined tin and smooth the surface to flatten and level cake. Bake in the oven for 1 hour. Remove from oven and set aside whilst making syrup.


Place all ingredients for syrup in a small saucepan, bring to the boil and cook for 1 minute. Allow to cool for 5 minutes. Whilst syrup and cake are still warm, spoon the syrup evenly over the top of entire cake. Allow syrup to soak into cake, and cake to cool before slicing.

Chocolate and Beetroot Mini Cakes

p1030541

“Chocolate and beetroot!”, you may well scream, “Are you mad?” These two ingredients might seem unlikely companions, yet they work tremendously well baked together in a cake.

I want to feel that cake I’m eating is offering some sort of health benefit. It means I can eat more of it. So what does the beetroot do? It adds fibre, and antioxidants, lowers blood pressure, and cleanses the liver. It’s a super food. And that’s enough reasons for me to bake with it.


p1030556

If you have fussy eaters who may not be adventurous to try this combination, just don’t tell them. Like me, you might accidentally forget to mention the inclusion of beetroot, and in most cases, your guests will be non the wiser. You can then take great delight in announcing afterwards that they have just eaten chocolate cake packed with beetroot.

They might just thank you for it.

p1030557

Chocolate and Beetroot Mini Cakes

Ingredients

For the cup cakes

100g chocolate – 70% cocoa, chopped into small pieces

150g softened butter

1 cup caster sugar

2 free range eggs

1 cup grated beetroot (2 small beetroot, peeled)

1 cup plain flour

¼ tsp baking powder

¼ tsp bi carb

1/3 cup milk

For the chocolate icing

100ml thickened cream

100g chocolate -70% cocoa, chopped finely

Pre heat oven to 180C or 160C fan forced. Line a 12 holed, ½ cup capacity muffin mould with paper cup cake liners. Place chocolate in a heat proof bowl over a shallow pot of simmering water. Stir and melt chocolate till smooth. Set aside to cool slightly.

Cream together butter and sugar till pale and fluffy. Add eggs one at a time, scrapping bowl between additions. Add grated beetroot and combine.

Sift flour, baking powder and bi carb onto butter and beetroot mix. Add milk and beat till combined. Pour in melted chocolate and mix till well combined.

Divide cupcake mix between the 12 cupcake cases. Bake for 20 minutes. Set aside on a baking rack to cool.

For the ganache icing, heat thickened cream in a small saucepan, turn off the heat just before it comes to the boil. Add the chopped chocolate, stand for 1 minute, then stir till chocolate melts and ganache is smooth. Stand for 10 minutes. Spread icing onto cooled mini cakes. Store left over cup cakes in a sealed container in the fridge.